Showing posts with label carved flowers. Show all posts

Thursday, June 7, 2018

Little Boxes - Finished!


These are my favorites out of all the boxes. Particularly the one on the left. The ash glaze was sprayed on and it worked well with the blue slip.


This one is also among my favorites, except for the fact that I knocked the edge of the rim off while getting it ready to load in the bisque kiln. I was going to scrap it, but Jeff sanded the broken area down. I guess now I get to keep it for myself.


I liked this one a lot... and then I took the lid off!


The crack goes all the way through. My guess is that I left some water inside when I closed in the form. As you may remember, these were made in one piece.


This one is my least favorite. It just doesn't do anything for me. I guess there are bound to be clunkers every so often!


Friday, August 30, 2013

Replenishing

Our inventory of mugs is at an all time low. I spent the first part of this week remedying that situation. I really like making mugs. They employ all the fun parts of pottery; throwing, pulling handles, and for me, carving designs.


 Jeff took this photo of me working the other night. It gave me a good look at my new hair! I spent the last year growing out my hair color... what an awful thing to go through when your hair is long! I have slowly been having 3-4" cut off at a time to eliminate the two-tone look. Once the color was finally gone, I was left with mousy brown and gray hair. My niece Kayla is a hairstylist. While I was in NH she cut in some more layers and gave me just a few highlight to perk it up. They are subtle, and I won't have to be a slave to them.

Now back to pottery...

The mugs are done. I think I made 28. Now I am on to bowls and platters. The weather has been muggy (no pun intended!), hopefully I can dry them enough to do some trimming today.

Sunday, July 7, 2013

4th of July Firing


Jeff and I unloaded the kiln this morning. We actually waited until it was really cool before unloading, that could be a first for us!

 The firing was an overall success. I am happy with the small casseroles. Jeff had a couple of pots where the shino crawled (of course one was an order). I will spare you the sad photos.


The underglaze experiment is just ho-hum. The underglazes look much better fired to ^6. Jeff and I talked about doing some ^6 electric firing. Maybe during the winter when we have more time for experimentation.

There were lots of orders in this firing, so part of tomorrow will be spent packing and shipping... at least I have a plan for the day.
Enjoy your Sunday!

Wednesday, July 3, 2013

glazed over...

I have had little time for blogging these days. We are on a mission to get work done for our third anniversary in Seagrove event (July 20th) and then the League of NH Craftsmen's Fair, the first week of August. 
The last few days have been spent glazing. We are a day behind because of the rain. Typically we glaze a bunch of pots, then carry them through the yard to the kiln. This frees up space in the studio as we work. Unfortunately it rained so hard we barely had to time to move pots in between the rain drops, which meant we were working in a crowded space. Which also meant the kiln didn't get loaded. We seem to be having a break in the rain today (at least for a bit!). The kiln will get loaded today and we will have a 4th of July firing tomorrow.

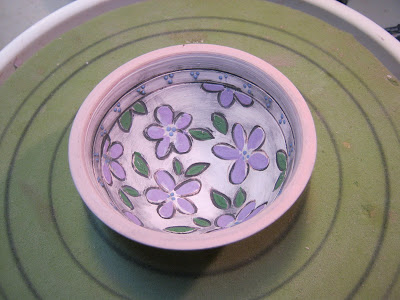
To break up the monotony, I decided to experiment with some underglazes on this little bowl. I did a few test pieces some time ago that were sort of meh. I hoping that now I have a little more understanding of how they will fire to ^10. I will let you know in a few days!


The most time consuming thing is glazing my shino and green flower and leaf designs. I have to wipe off some of the shino and then wax the rims before carefully pouring in the green. The overlap of the two glazes will go a little red and I don't like it to be defined line, hence the wiping off. It's tedious work and my hands and elbow are sore at the end of the day.


Applying the wax goes quickly but takes forever to dry...

and actually this wax always stays sticky. You have to be very careful when handling the pots for the next glaze application because it will come off and stick to your fingers. I wished I had saved the bottle of wax I used three bottles ago, it didn't stay tacky. I have to do some research and figure out where I ordered it from. I am open to suggestion if you have any.

This kiln won't get loaded with me sitting at this computer and I best get to work while the sun shines.
Happy Independence Day to all!

Wednesday, June 12, 2013

A Few Highlights from the Wood Firing


 We are slowly getting the bottom of pots ground, sanded, and photographed. These are listed on Etsy and I will be adding more over the next few days.


In between all that grinding and sanding, I did make a few carved plates with handles...

With all the rain and humidity it has taken forever to get them finished. On tomorrow's list is one quart casseroles with carved lids. I want to get as much of my own work finished before we get ready for the League of NH Craftsmen's Fair in August. It's only Jeff's work at that show so it won't be too long before I will be working mostly as his assistant.... weighing clay, waxing bottoms, glazing pots, and loading kilns. I am praying that this July won't be as hot as last year!

Saturday, March 16, 2013

An army of pigs

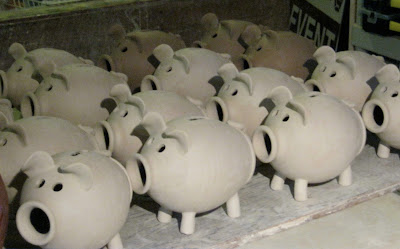
I haven't had a whole lot of time for blogging this week. Our good friend Rob was on spring break from his college gig and stayed with us for a few days. In between visiting and cooking up some fun meals, I still had all those piggy banks to finish. It seemed like it took FOREVER. Last night I assembled and glazed piggy banks in my sleep. I woke up feeling like I did a whole night's work... but when I opened the studio door this morning, a whole lot of pig bodies were still waiting for me.


But now they are DONE and there are a few new designs in this herd of swine...


In between the swine there was a mug order to complete.


I think this week may be a little more productive.

Thursday, January 17, 2013

Practice Makes Perfect

Jeff is teaching his "Practice Makes Perfect" workshop at our studio this weekend. The workshop focuses on enhancing your skills using production pottery techniques. I call it pottery boot camp. I took this workshop with Jeff nearly ten years ago. I was student at the time with a full time job... I thought my arms might fall off by the end of the weekend!
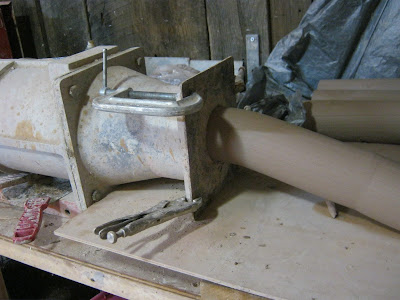
Needless to say, we need lots of clay ready for the participants. I pugged a whole bunch of clay and the last time through, I attached a die to the pug mill to make smaller lugs of clay.


When you drop these smaller lugs through the harps, pictured below, they are cut to a certain weight. The first harp is one pound, the second 1 1/2 pounds etc...
It saves a lot of time when doing production work. No weighing out balls of clay.


The workshops we teach at our studio are small, 5 to 6 participants. If there is a group that wants to come we can work around your schedule to meet your needs. Jeff also travels to other studios and clay centers to teach. If you are interested in a workshop at our studio or yours, send him an e-mail for more info: jeff@jeffbrownpottery.com.


In between our studio clean up marathon, and pugging clay, I managed to roll out some slabs and make some square soap dishes. They are nice chunky dishes that can be used for other things as well. Typically I just stamp the insides, this time I slipped and carved half of them. They were a nice break from wheel work.

It's been pouring rain off and on here for a couple of days. Tonight they are predicting snow. The snow may actually be a nice break from the rain... did this New Hampshire girl really just say that???


Wednesday, January 16, 2013

Happy Pots and Happy Potters

 I quickly photographed a selection of Jeff's finished medieval ware. It will go to it's new home this week. I am partial to the two handled bottle. Jeff was surprised that it's my favorite, it's the one piece of  the medieval collection that he finds peculiar. These have a very thin layer of ash glaze, which is sort of tricky to apply. I am thinking of glazing a few piggy banks this way.


There are new pots in the Etsy shop. My mug selection was pretty thin. I have quite a few of the swirl mugs with tenmoku and shino glaze. I think they look like they are begging for coffee!


Lots piggy banks in this firing...


One of the new combos...

 Nuka and Blue

Valentine's Day is less than a month away... wouldn't your sweetheart love some new pottery? Clicking on the photos will take you to my Etsy shop.


Monday, August 27, 2012

Online selling

I set some goals for myself this year, and one was to double my sales on Etsy. I figured it was attainable because I really hadn't sold all that much in the past, mostly due to the fact that my interest in it came and went.
This was the year to get serious.
I am getting close to my goal and I figure with the holiday season coming up, I might even surpass it. Don't get me wrong, I am not making tons of money through the site, but Etsy has brought in money that I otherwise wouldn't have in my pocket. To make a living in clay you need to be selling work in a variety of places and venues. Compared to craft shows, Etsy is a piece of cake... but we won't stop doing them. As a matter of fact, this year we have kicked it up a notch and are doing a few more shows... check out my events listing on the right side of this page.
Tracey Broome did a blog post the other day about Big Cartel. I hadn't even heard of it (where have I been??). Tracey already made a sale through the venue! Since you can give it a try for free, I am considering jumping in.

In the meantime, I have been adding some new items to my Etsy shop...


as always, pigs are the #1 sellers!

Saturday, June 30, 2012

why do i like to torture myself...

with cake stands?

I have made so many of these throughout the years and can say that only a handful haven't warped. This spring I made a small one in this style and it fired quite nicely. We shall see how larger ones hold up. These should accommodate an 8" cake when finished. Of course I had to add all this carving to these so that if they warp it will be all the more painful. I am thinking about bisque firing these upside down. Maybe that will reduce warping... thoughts anyone?

Then there's the glazing, because of course I want them to be the shino and green combination.


Wednesday, June 20, 2012

Shifting into high gear

This has been the week of the platter. Both of us have spent the last few days throwing them. Unfortunately I lost two of mine to over zealous trimming. Yesterday it looked like we were growing platters in the yard. They were scattered all about so that they would be dry enough to bisque fire today.

Jeff gave me a couple of his to carve. There was a planned power outage yesterday morning, so I worked on the porch so that I could see what I was doing.

The first one has a cool textured rim. It's made with STARwork's new Seagrove clay. It definitely has a different feel for carving. We will save this one for a wood/salt firing.


This one is Highwater Aurora, which is like carving through cream cheese.

Yesterday Jeff organized the calendar with what needs to be thrown next, and created a firing schedule. We need to stay on track in order to be ready for the Craftsmen's Fair in August. I was looking at the calendar this morning and realized that we will be gone for nearly 3 weeks!  I am looking forward to seeing friends and family while we are in NH, but 3 weeks is a long time to be away from Sophie, and I know she will miss us too.


Thankfully we have a great kitty and gallery sitter.

Monday, June 18, 2012

Pigs, Pots, and the life of a Potter

This is a small sampling of what's been happening in studio for me...


 Teeny tiny pigs... I made a few back in March. They sold rather quickly. Someone messaged me on Etsy and asked if I was the little pig maker. She bought the last one (that wasn't on Etsy) and ordered two more. The little pigs are almost harder to make than my standard piggy bank, but I do sell them for less. I think if I keep making them they will go a little quicker.
Some clay artists might say ask why we make piggy banks when we make so many more artistic pots?
My answer is... Piggy banks sell. In order for us to make a living solely on pottery, we need to make pots that pay the bills. I think we allow ourselves the time to make both the pots that sell quickly, and the pots that exemplify our artistic talent. It's all about a balance.

Just work.

In the meantime, we still put our heart and soul into EVERY pot we make.


Wednesday, June 13, 2012

working...

We are going to be participating in a wood/salt firing in Carthage this summer, so I have been making pots for that in between the usual repertoire...


 The two bottles in the middle were made with STARworks new Seagrove clay. It's formulated specifically for firing in wood and salt. It was so different to throw with after using the Highwater Aurora clay. It's groggy and sandy, and throws quite well.

I finished a bunch of these bowl yesterday... finally. It seems like it was forever ago that I threw them. The humidity meant they took forever to dry enough to trim. These will be shino on the inside and gloss green on the exterior.

Lately it seems the weeks are flying by. It scares me a little because we have a 10  9 day show to do in NH the first week of August.

10  9 days = lots of pots to be made!

Thursday, May 17, 2012

Mashima

While Jeff was away in South Korea I read the Newberry Award winning children's book, " A Single Shard"by Linda Sue Park. A customer recommended the book to me and being a big fan of children's lit, I had to read it. I thoroughly enjoyed the story which wove a tale of the introduction of inlay work to South Korea in the mid to late 12th century.
As you know, Jeff came home with lots of little pots. Many with sgraffito designs and a few with porcelain inlay, also known as Mashima. He chose these pots because he knew that the carving and inlaid designs would inspire me...
I did some reading online as well as referring to my "go to" book for surface decoration, "Surface Design for Ceramics" by Maureen Mills. Maureen is the head of the ceramics department at the NH Institute of Art. I decided to try two methods of inlay. First was from Maureen's book, using a slip trailer to inlay the porcelain into my carved designs:

This worked best for vases which needed to be trimmed prior to the inlay. It was easy to clean up the excess slip with a scrubby but I did have some issues with the porcelain and stoneware drying unevenly.

Next I did some tiles where I carved them when moist and applied the slip with a brush immediately after:


Once the tiles were almost dry, I used a scrubby to remove the excess slip and reveal the inlay pattern:


This method was quickest for applying the porcelain slip and for the most even drying of the two clays, but it was a lot of work to clean up. I am not a fan of creating so much dust, I did it outside and really should have worn a mask. It was so darn humid today that I couldn't bring myself to wear one.
I am going to try two different glazes on these. Temple white, which is a translucent glaze and Celadon.

Jeff and I also collaborated on this little teapot...

Korean teapots are very small... this one fits in the palm of your hand. It was quite challenging to carve a design into!
Jeff may have been the one that made the trip to Korea, but his visit has inspired us both!